Hello all,
Today I have a review of Pretty Woman Designer nails, 24 pack press on nails. These retails for $7.99 USD on Pretty Womans site as well as in Walmarts in the US. I did receive these to test out for you and I have been putting them to the test for over a month to give you all the gory details.
Firstly, these nails come in 15 different designs, 5 different nail shapes and 3 different lengths as well. Each pack contains 24 nails which come in 12 different sizes, each nail has a number inscribed on the bottom so you can pair them easily. Also in the pack are 30 adhesive nail tabs, nail glue, an applicator, a nail file and a cuticle stick. One of the things I really appreciated about this kit is that you have the option to chose how you want to stick the nails on; glue or adhesive tabs. Furthermore, fair warning that this was my absolute first time trying on any artificial nails so I really did take my time to test these out to make sure my results were not biased due to my lack of experience.
I received two designs to try out for my blog; the red matte design (square shape, ultra short length) and the blue, black and white geometric design (square shape, medium length).
Application of the nails was fairly easy even though it was my first time. The packaging does not come with detailed instructions because the directions are really simple and there is a small diagram. I did try out both methods of application with the different designs and my favorite way to wear these nails is using the glue. In my experience the glue held the nails in place for a week with no lifting. I did not have any issue showering while wearing these nails and my hair never got caught in them. I did have a couple of nails pop off but in my experience this was due to user error. The first nail that popped off was when I hit my hand against the wall right at the tip of my nail, it did not hurt but the force was enough to make it pop off.
My next nail popped off on my finger that had the shortest nail bed. I do not attribute this specifically to the quality of the glue since for the medium length press on nail, my nail was only long enough to fit at the halfway point. My advice is the pick the nail length similar to yours or file down the artificial nail to fit your nail more so as to prolong the wear of your manicure. Also, the instructions say not to press down on the nail when you are applying glue, this is key. I personally found that when I pressed down on the nail, the glue spilled over the sides and tip of my nail, leaving less on the nail bed to adhere.
Application of the nails with the adhesive tab was really easy, the tabs come in varying sizes so they can fit the nail. The are sticky on both sides so you can use them to get the nail on. This method of application was not my favorite because I felt like I had to apply a lot of pressure onto the nail to make the nail stick. I also felt that the adhesive was not long enough to grip the whole nail bed. The longevity of the adhesive tabs are nothing special, my nails started to pop off after a day. Interestingly enough, even though the nail had popped off, the tab remained sticky so you could just press your nail back on.
Between the two methods, I would recommend using the nail glue since it gives a longer wear. However, if you are interested in these nails for a one night event and want to easily remove or reuse them, the adhesive tabs would be perfect. The adhesive tabs last a day and are easier to keep in your purse for touch ups than the glue would be. In addition the tabs are easily removed off of the nail with the cuticle stick so they can be reused even with the glue. If you use the glue, the nails are somewhat reusable, you will want to make sure the surface is flat and those results will differ depending on how much glue you use. Another important thing to note is that these nails are not indestructible, the design can still scratch off through wear. I wore these nails for 7 days at a time and did not notice any major wear, they held up really nicely.
Removal was very simple for both methods of application. The easiest being the adhesive tabs, you can easily use the cuticle stick provided to pop them off your nail with no pain. The recommended removal method is to soak your nails in nail polish remover for 3-5 minutes. I did not try this method because it seemed a little harsh. What I did instead to remove the nails I had attached with glue was first apply cuticle oil and then slowly push them off with the cuticle stick. This will leave some glue on your nails which you can remove. Do keep in mind that I removed the nails after 7 days so if you are removing them sooner, this method might be painful.
Overall, for the price I really do enjoy these designer nails. They provide a quick and easy manicure with a really decent wear time. My absolute favorite thing about these nails is how they fit the cuticle; the curve of the nail is so lovely that it is not obvious you are wearing fake nails. Also because of the curve I feel like they fit my nail very nicely which helps the wear.
Leave me a comment below if you've tried any of Pretty Womans designer nails or which brand you love for press on nails!
Wednesday, 28 June 2017
Sunday, 30 April 2017
Born Pretty Store Holographic Nail Polish
Hello all, recently I was contacted by Cynthia from Born Pretty Store seeing if I was willing to review some products from them. I already shop at this store and have plenty of products that I bought myself so I was really excited to do this review as I already enjoy a majority of their products. I was able to pick out the items for review and all the opinions expressed are my own. I received three items to review; two stamping plates and a holographic polish. For a review and details on the stamping plates please see my Instagram page and for the polish just keep reading!
The polish I am reviewing is item #6410, it is a 6 ml bottle and the shade is a lovely holographic teal. As per usual I conducted a wear test with no base or top coat to truly test the quality of the nail polish in question.
The formula of this shade was alright overall, I was not completely happy that it required three coats for full opacity. However while I was applying it, each coat went on really smoothly and left no streaks so I enjoyed the formula overall.
My first chip was three days after my initial application on my middle finger. This is pretty much usual for me as the middle finger is the longest it seems to always chip first. This does not surprise me and I felt as though the polish was holding up nicely with minimal tip wear.
After day five my manicure started to look very worn down, the chips on my middle finger had expanded and I got a chip on the side of my index finger. I kept the manicure for one more day after this update and found there was no change but I did remove it after six days.
Overall, I thought the quality of the nail polish was fairly average as I would hope for my manicure to last me five days and look decent. I did however really enjoy the color of this holographic polish, compared to my collection it was unique in tone and I did get complimented on the shade various times. All in all, I would definitely pick up some more of these holographic nail polishes for their color variety and decent formula. Born Pretty Store is fairly good with their pricing and does run plenty of sale but if you find a regular priced item that you would like, you can use my discount code ANNSW10 for 10% off. Hope you enjoyed the review!
The polish I am reviewing is item #6410, it is a 6 ml bottle and the shade is a lovely holographic teal. As per usual I conducted a wear test with no base or top coat to truly test the quality of the nail polish in question.
Three coats
Day three of wear.
My first chip was three days after my initial application on my middle finger. This is pretty much usual for me as the middle finger is the longest it seems to always chip first. This does not surprise me and I felt as though the polish was holding up nicely with minimal tip wear.
Day five of wear
After day five my manicure started to look very worn down, the chips on my middle finger had expanded and I got a chip on the side of my index finger. I kept the manicure for one more day after this update and found there was no change but I did remove it after six days.
Overall, I thought the quality of the nail polish was fairly average as I would hope for my manicure to last me five days and look decent. I did however really enjoy the color of this holographic polish, compared to my collection it was unique in tone and I did get complimented on the shade various times. All in all, I would definitely pick up some more of these holographic nail polishes for their color variety and decent formula. Born Pretty Store is fairly good with their pricing and does run plenty of sale but if you find a regular priced item that you would like, you can use my discount code ANNSW10 for 10% off. Hope you enjoyed the review!
Monday, 6 February 2017
Goals for 2017
Hello all,
For 2017, I had some nail polish goals that I wanted to share with you and hopefully you share some of yours with me too. As a nail polish lover I certainly end up buying multiple nail polishes at a time and I do not always get to trying all of them. We all have our favorites and I find myself with a large number of nail polishes I have yet to use on myself for a full manicure. In fact, I have 764 nail polishes in my collection so far and out of those, there are 333 nail polishes I have not used. I may have used those colors for detail work or on someone else but they still remain an untried in my eyes. I simply think having 333 nail polishes in my collection that have never been tried is way too high of a number so I really want to lessen that number significantly.
One of the ways I hope to do that is actually hold off on buying more nail polishes until the end of April just to focus on what I have and not increase the number any more. Overall, my goal is by the end of April, I want to cut the number of untried shades to about 250. In addition, as the year goes on I do want to continue to use shades but I won't necessarily be on a no buy.
My second goal for 2017 is actually fairly contradictory because I want to do a project polish with a few shades from my collection. If you are not familiar with the concept, a project polish is essentially when you try to finish as many polishes as you want within a certain time frame. I went through my collection and there are a few shades that have been barely hanging on or I have doubles or I just do not care for the formula. So I picked out 4 minis and 7 full sized nail polishes along with a top coat to try and use up by the end of 2017. That may sound like a lot but all the full sized polishes except for one have anywhere from half to a third of the bottle already used up. Overall I think it is a easy task to use them up within the year but again it does conflict with my first goal.
I'm currently not planning on doing any project polish updates here on my blog, I may possibly make a post on my Instagram. However if you are interested in what I am working on feel free to ask me below or if enough people are interested I may do a monthly or bimonthly update. If you have any goals for 2017 you want to share with me I would love to hear it! Thank you for reading!
For 2017, I had some nail polish goals that I wanted to share with you and hopefully you share some of yours with me too. As a nail polish lover I certainly end up buying multiple nail polishes at a time and I do not always get to trying all of them. We all have our favorites and I find myself with a large number of nail polishes I have yet to use on myself for a full manicure. In fact, I have 764 nail polishes in my collection so far and out of those, there are 333 nail polishes I have not used. I may have used those colors for detail work or on someone else but they still remain an untried in my eyes. I simply think having 333 nail polishes in my collection that have never been tried is way too high of a number so I really want to lessen that number significantly.
One of the ways I hope to do that is actually hold off on buying more nail polishes until the end of April just to focus on what I have and not increase the number any more. Overall, my goal is by the end of April, I want to cut the number of untried shades to about 250. In addition, as the year goes on I do want to continue to use shades but I won't necessarily be on a no buy.
My second goal for 2017 is actually fairly contradictory because I want to do a project polish with a few shades from my collection. If you are not familiar with the concept, a project polish is essentially when you try to finish as many polishes as you want within a certain time frame. I went through my collection and there are a few shades that have been barely hanging on or I have doubles or I just do not care for the formula. So I picked out 4 minis and 7 full sized nail polishes along with a top coat to try and use up by the end of 2017. That may sound like a lot but all the full sized polishes except for one have anywhere from half to a third of the bottle already used up. Overall I think it is a easy task to use them up within the year but again it does conflict with my first goal.
I'm currently not planning on doing any project polish updates here on my blog, I may possibly make a post on my Instagram. However if you are interested in what I am working on feel free to ask me below or if enough people are interested I may do a monthly or bimonthly update. If you have any goals for 2017 you want to share with me I would love to hear it! Thank you for reading!
Thursday, 26 January 2017
Top 16 Polishes of 2016
Hello all,
This next one should not be a surprise to anyone because I have reviewed this shade and talked about how much I love it. I got this beautiful shade from Pretty Woman in my Ipsy bag one month and online the pictures did not do it justice. This shade is a bright fuchsia that borders neon in my opinion and the formula is perfection. The brush on this particular shade is so unique and it very opaque and dries quickly.
Continuing with Pretty Woman, I also had a chance to try out this gorgeous light taupe shade with a touch of purple undertones. This shade was my go to this year so something simple and flattering. This is part of their nudes collection which is designed to suit many skin tones and I definitely think this shade was well curated.
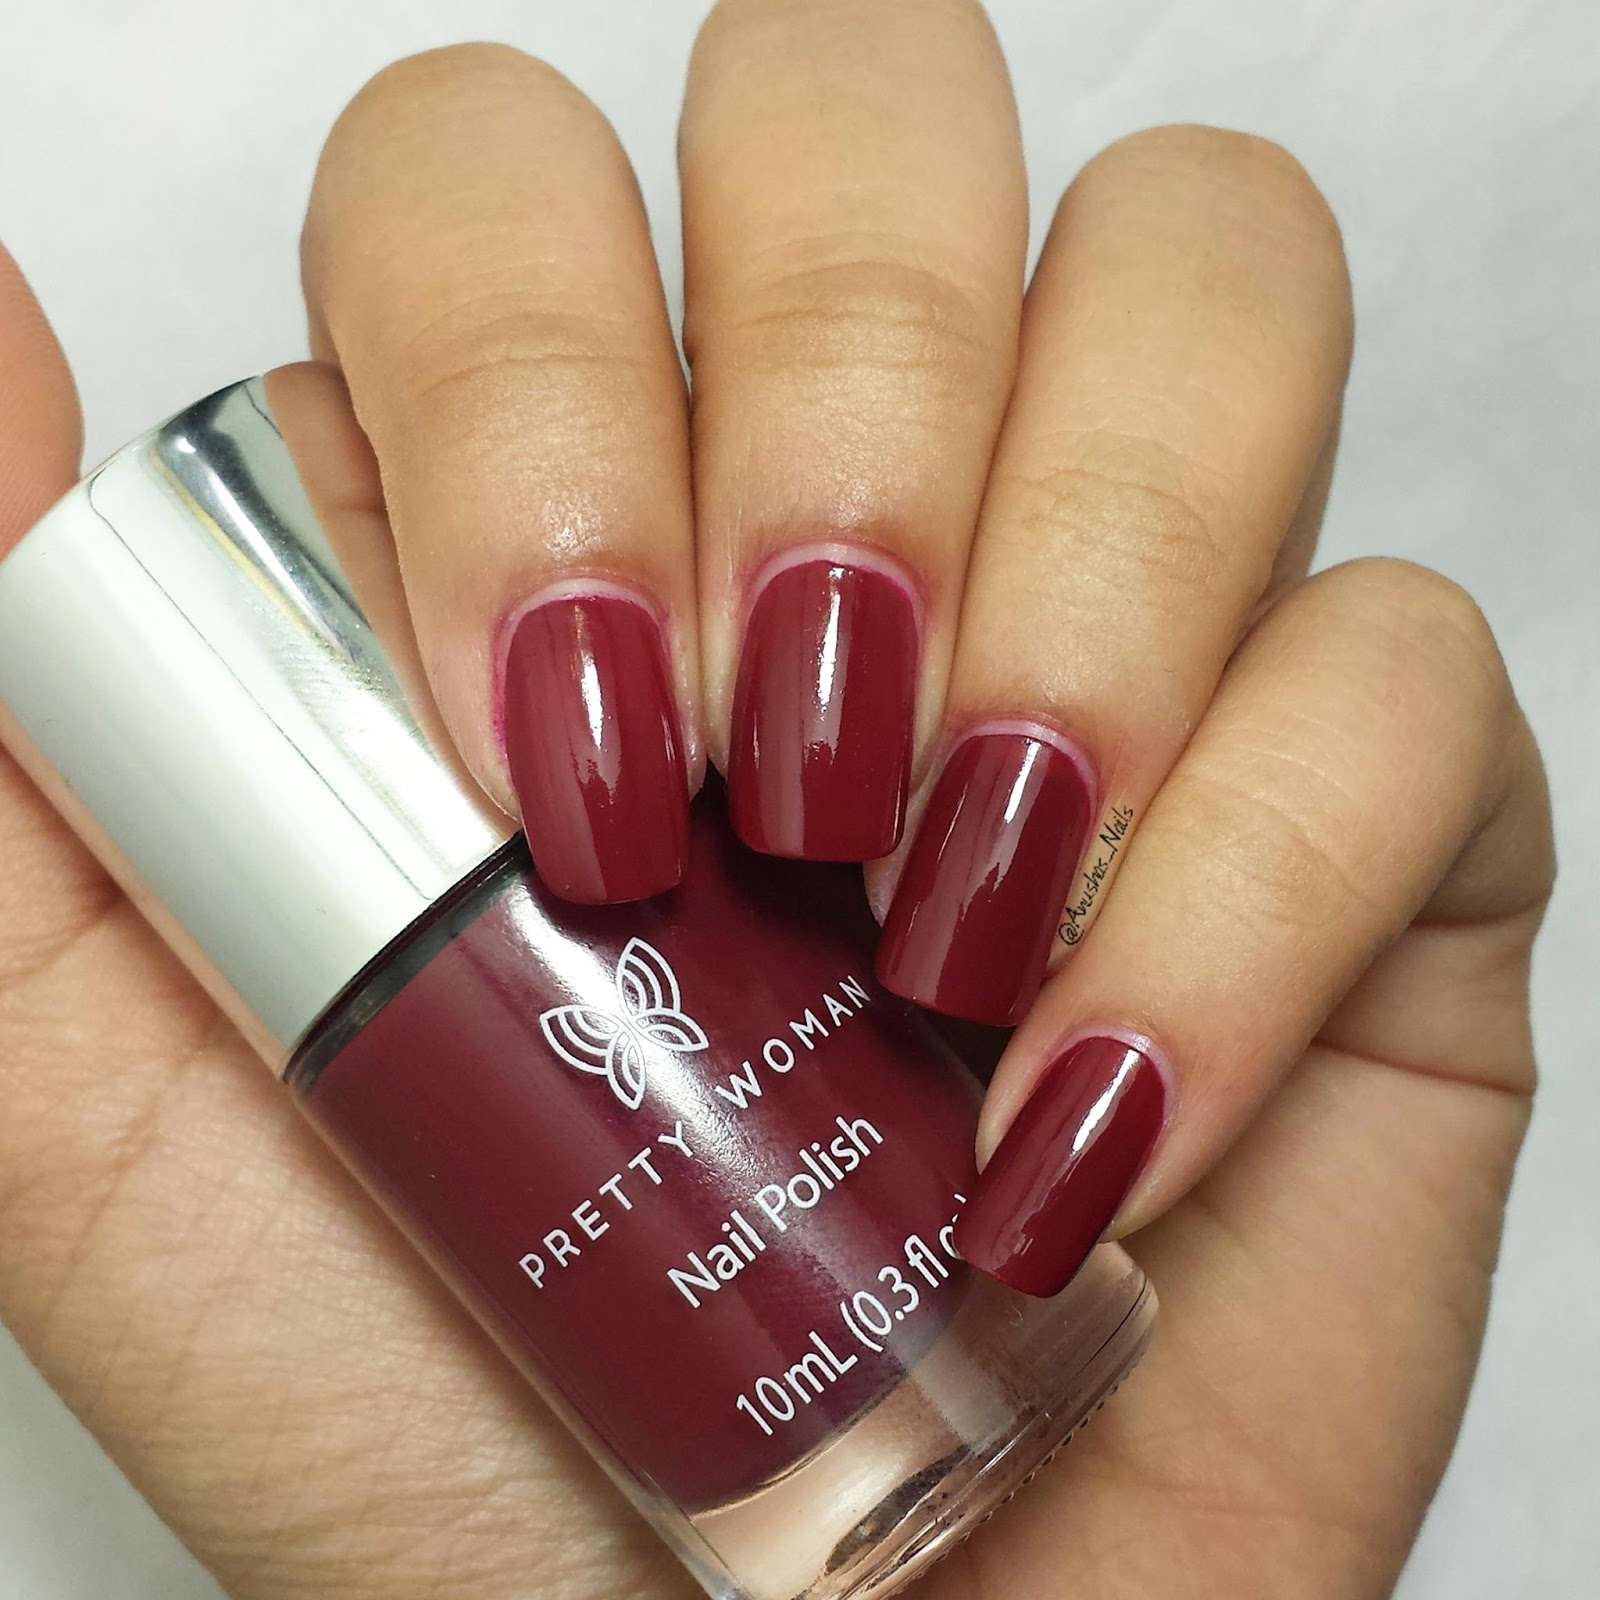
This is the last Pretty Woman polish to make the list and I just loved the shade so much I had to include it. This shade is actually a relatively new launch but this shade is absolute perfection for this time of the year. It is a beautiful mid-tone red with a lot of depth to the color without coming off as obviously dark. I think Pretty Woman nailed this shade and I can see myself reaching for it a lot in the future as well.
When I walked into Shoppers and saw this shade, I just knew I would love it. But when I got this on my nails, I was ready to go back and buy a back up even if it was at full price. I generally do not buy many Quo by Orly nail polishes as they can be very expensive and a lot of the colors do not excite me but this one I am very happy I bought. This shade is a lovely dusky purple, it is a lighter tone so it works very well as a fall or winter shade. The formula is alright, you may be able to get away with two coats but I prefer three.
This could possibly be my favorite polish of 2016, I even have a back-up of this. This is Enter Wonderland from Essence's Hidden stories collection. The formula is impeccable, completely opaque in two coats, I had to do three for my swatch because I nicked my nail while it was wet. This is marketed as a matte but it does not dry down crazy fast like a lot of mattes do, so you can manipulate this easily. Now, if you are familiar with OPI My Boyfriend Scales Walls, you will know that it is a white base with a few drops of grey. This shade however is the complete opposite; it is a very light grey with a few drops of white. When I compare the two, they actually look like duplicates of each other but I prefer the Essence one.
Pink Satin is by no means a new shade to the Sally Hansen Xtreme wear line but it was certainly new to me in 2016. I really enjoyed how much dimension this shade had and course that it was opaque in one coat. I have used this for stamping as well and really enjoy this shade.
Sally Hansen Complete Salon Manicure line usually hits the formula out of the park for me and this shade was no exception. I really enjoyed this dusky lilac in the fall months and to pair it with nail art. I always love the brush and opacity in this line so it is no surprise that one of them ended up in my top 16. In my opinion because it is a dusky lilac, you can wear this shade all year round.
In my collection of over 700 nail polishes, it will surprise you to learn that this is my only emerald green polish and it's a mini. I love the having an emerald green nail polish and I really want more but I cannot seem to find many. This particular one is very lovely and I have to applaud L'oreal for doing a mini polish right. The brush on this is the same as you would find in a Sally Hansen CSM or Wet and Wild; very wide. And that is an amazing feature to have in a mini nail polish. I really wish I had a back up of this one.
Another Formula X and Ipsy find for me this year. I received the mini bottle of Huntress in one of my Ipsy bags this year and I loved it so much that I had to buy the full size. This shade has so much to it that this picture does not do it justice. The base of this shade is actually a navy blue, you can clearly tell in the first coat but it does blend away in the second. On top of that it is a green to golden shift almost like a duo-chrome but not quite there. It looks different in almost every light and I just really enjoyed wearing this shade.
I did do a review on the Essie gel couture line and this was the shade I did my wear test with. This shade is a dark metallic grey with a green shift and it looks very elegant on the nail. I enjoyed the formulation and how this color complimented my skin tone. I do recommend this line of lacquer.
My last indie polish to make it in my top 16 is from Cupcake Polish. The color speaks for itself in my opinion, one coat will get it opaque but I do add a second coat to deepen the color at times. The formula on this is not the best, this shade does have a tendency to peel off of my nails. However, I purchased this shade for myself when I got a new job and for that it will always be sentimental to me and to top it off, it is a color like no other.
One of my favorite nail polishes to wear are definitely lilac like shades and this shade was quite beautiful to me. It is a lilac with a touch of blue and some very faint shimmers. You can pick up the shimmer in real life in good lighting and it just makes the color seem very soft.
To wrap up my top 16 of 2016 I want to mention Essie's shade in Penny Talk. This is a pretty iconic shade from Essie and I always always hesitant to buy it because of its price tag but I did catch it on sale this year and I am very happy I got it. It is absolutely opaque in one coat and dries down fairly fast. Now personally, I do not enjoy wearing this tone by itself with my skin tone but I love using it for detail work. This shade stamps like a dream and I would repurchase even if it wasn't on sale.
That does wrap up all my stand out polishes in the year 2016, I did try quite a few but these are the shades that really stuck with me. Feel free to leave me a comment below and let me know if you fell for any polish in 2016!
I hope you had a wonderful new years and ended 2016 happily. I myself spent new years eve relaxing and had a very calm day. I wanted to share with you today my top 16 nail polishes of the year 2016. Now some of these polishes were released in 2016 and others I just happened to discover in 2016. I do have a lovely mix of core collection colors and a few limited edition shades. I will be listing them in no particular order because I just can't pick a favorite among these easily.
Three coats of Hookah Smoking Catepillar
Let me start with a lovely Indie polish, Hookah Smoking Caterpillar by Girly Bits. This gorgeous shade is from their "A Little Madness" collection that was inspired by the Alice through the Looking Glass movie that came out this year and it is amazing. I personally try to stay away from buying Indie nail polishes, I think they can be overpriced and you have to buy them online which can at times result in a color variance. But when I saw this shade, I did not want to wait for a sale or any reviews, I just bought it and am completely in love with it. This shade can be opaque in two or three coats depending on how thin your coats are. It has a very distinct duochrome of purple and blue plus lots of holographic microglitter that just add extra dimension to this shade. Personally I have been very excited about all things Alice in wonderland this year which brings me to the next polish in my top 16.
Two coats of Cheshire China with top coat.
This is Cheshire China from the Sinful Colors Live in Colorland collection. This shade is just a beautiful color but it also has a sentimental value to me because my good friend Liza, actually searched for this shade and sent it to me in Canada. It was just a very sweet gesture and I will always think of her kindness when I wear this color. This shade is a semi-matte finish and because of that, you can still manipulate it without it drying too fast. I however prefer to wear it with a top coat.
Two coats of Atlantic Mist with top coat.
This beautiful teal sage shade from Formula X is a surprising favorite for the year 2016. I had ordered this shade on a whim sometime in November and tried it out on my toes. I fell hard for this shade it is completely unique in my collection. It is a very light teal sage where in some lights you can see the more blue tone and in others you can see the grey-sage tones. It has a beautiful formula and glided on with ease.
Two coats of Pouty
This next one should not be a surprise to anyone because I have reviewed this shade and talked about how much I love it. I got this beautiful shade from Pretty Woman in my Ipsy bag one month and online the pictures did not do it justice. This shade is a bright fuchsia that borders neon in my opinion and the formula is perfection. The brush on this particular shade is so unique and it very opaque and dries quickly.
Two coats of Cherry Bean.
Continuing with Pretty Woman, I also had a chance to try out this gorgeous light taupe shade with a touch of purple undertones. This shade was my go to this year so something simple and flattering. This is part of their nudes collection which is designed to suit many skin tones and I definitely think this shade was well curated.
Two coats of Wine-O.
This is the last Pretty Woman polish to make the list and I just loved the shade so much I had to include it. This shade is actually a relatively new launch but this shade is absolute perfection for this time of the year. It is a beautiful mid-tone red with a lot of depth to the color without coming off as obviously dark. I think Pretty Woman nailed this shade and I can see myself reaching for it a lot in the future as well.
Three coats of Cashmere Sweater with top coat.
Three coats of Enter Wonderland.
Three coats of Enter Wonderland with top coat.
This could possibly be my favorite polish of 2016, I even have a back-up of this. This is Enter Wonderland from Essence's Hidden stories collection. The formula is impeccable, completely opaque in two coats, I had to do three for my swatch because I nicked my nail while it was wet. This is marketed as a matte but it does not dry down crazy fast like a lot of mattes do, so you can manipulate this easily. Now, if you are familiar with OPI My Boyfriend Scales Walls, you will know that it is a white base with a few drops of grey. This shade however is the complete opposite; it is a very light grey with a few drops of white. When I compare the two, they actually look like duplicates of each other but I prefer the Essence one.
One coat of Pink Satin.
Pink Satin is by no means a new shade to the Sally Hansen Xtreme wear line but it was certainly new to me in 2016. I really enjoyed how much dimension this shade had and course that it was opaque in one coat. I have used this for stamping as well and really enjoy this shade.
Two coats of I Lilac You with top coat
Sally Hansen Complete Salon Manicure line usually hits the formula out of the park for me and this shade was no exception. I really enjoyed this dusky lilac in the fall months and to pair it with nail art. I always love the brush and opacity in this line so it is no surprise that one of them ended up in my top 16. In my opinion because it is a dusky lilac, you can wear this shade all year round.
Two coats of Feline Sauvage.
In my collection of over 700 nail polishes, it will surprise you to learn that this is my only emerald green polish and it's a mini. I love the having an emerald green nail polish and I really want more but I cannot seem to find many. This particular one is very lovely and I have to applaud L'oreal for doing a mini polish right. The brush on this is the same as you would find in a Sally Hansen CSM or Wet and Wild; very wide. And that is an amazing feature to have in a mini nail polish. I really wish I had a back up of this one.
Two coats of Huntress with top coat.
Another Formula X and Ipsy find for me this year. I received the mini bottle of Huntress in one of my Ipsy bags this year and I loved it so much that I had to buy the full size. This shade has so much to it that this picture does not do it justice. The base of this shade is actually a navy blue, you can clearly tell in the first coat but it does blend away in the second. On top of that it is a green to golden shift almost like a duo-chrome but not quite there. It looks different in almost every light and I just really enjoyed wearing this shade.
Two coats of Hang up the Heels.
I did do a review on the Essie gel couture line and this was the shade I did my wear test with. This shade is a dark metallic grey with a green shift and it looks very elegant on the nail. I enjoyed the formulation and how this color complimented my skin tone. I do recommend this line of lacquer.
One coat of Berry good Looking with top coat.
My last indie polish to make it in my top 16 is from Cupcake Polish. The color speaks for itself in my opinion, one coat will get it opaque but I do add a second coat to deepen the color at times. The formula on this is not the best, this shade does have a tendency to peel off of my nails. However, I purchased this shade for myself when I got a new job and for that it will always be sentimental to me and to top it off, it is a color like no other.
Three coats of Magik Touch with top coat.
One of my favorite nail polishes to wear are definitely lilac like shades and this shade was quite beautiful to me. It is a lilac with a touch of blue and some very faint shimmers. You can pick up the shimmer in real life in good lighting and it just makes the color seem very soft.
One coat of Penny Talk.
To wrap up my top 16 of 2016 I want to mention Essie's shade in Penny Talk. This is a pretty iconic shade from Essie and I always always hesitant to buy it because of its price tag but I did catch it on sale this year and I am very happy I got it. It is absolutely opaque in one coat and dries down fairly fast. Now personally, I do not enjoy wearing this tone by itself with my skin tone but I love using it for detail work. This shade stamps like a dream and I would repurchase even if it wasn't on sale.
That does wrap up all my stand out polishes in the year 2016, I did try quite a few but these are the shades that really stuck with me. Feel free to leave me a comment below and let me know if you fell for any polish in 2016!
Tuesday, 15 November 2016
Essie Gel Couture
Hello everyone, no doubt you have all seen or heard about the new Essie gel couture line and today I have review of it for you. Personally, I have seen so many reviews and I really just wanted to try it out myself and see how it holds up. Some basics behind this two step system is that it comes with one color coat and a top coat. The main claims behind this line is that you are supposed to be able to get 14 days of wear and an instant gel-like shine. Which means it is another nail polish system that is supposed to give you a gel-like manicure without the need of a UV or LED light. An interesting feature behind the polish is that the barrel and brush are completely different from what you normally see from Essie. The brush is very wide so that you can do your whole manicure with a few easy swipes. In addition, the barrel is supposed to be curved in a spiral so that any polish on the barrel is deposited onto the brush in a way as to not flood your cuticles.
Before talking about the formula and wear test I want to mention my experiences with the features of this line. The spiral barrel was only on the color coat which was really disappointing to me because it ruined the continuity of the bottles for me. The top coat can still flood your cuticles and cause your manicure to chip or peel from the cuticle line. So I did not understand why they did not keep the same barrel. In addition, while doing research on the line, I found that one of the reasons Essie chose the brush was that so it could form to different nails. You are supposed to be able to compress or flatten the brush by wiping it on the bottleneck to get the shape that you need. I felt that was really hyped up, the brush did not show any particular flexibility nor did it hug my nail spectacularly enough for me to attribute to this Essie brush only.
Two coats of hang up the heels
The formula of the nail polish was really lovely. It absolutely glided onto the nail and applied pretty evenly. This shade in particular is a gorgeous black with a green shimmer. The green is visible in direct light but this shade looks black otherwise. The top coat was a great success for me, it did not disturb the layer of color I had underneath and dried fairly quickly. I really loved the shine that the top coat gave me, so much so that I would use this top coat separate of this system.
Day nine
I did not make it to 14 days, but I really feel like this color would have lasted nicely up to that point. My nails first chipped in the morning of the ninth day of wear. Usually when I get a chip, the polish will just continue to chip away at that point, however I wore this polish until day ten and found that the chip did not spread. The tip wear you are seeing on my other fingers started being prominent around day four or five. But the tip wear was not enough to make my manicure look bad.
The reason I did not take a picture of day ten wear was because it looked the exact same as day nine. I only decided to end my wear test because I was tired of the color and the space between my cuticle and the polish was getting too big for me. Also, once it chipped I just wanted a fresh manicure. Overall, this polish lasted beautifully for me and I would 100% recommend it to others. I don't want to compare this to the Wet n Wild one step wonder gel because that is an unfair comparison considering this is a two step system. But in comparison to the Sally Hansen miracle gel, I enjoy this line ten times better. While both the systems last fairly similarly over ten days in terms of chips and tip wear, the miracle gel cracked on me. The Essie gel couture did not crack and in addition, the top coat for this line performed very well. Whereas the miracle gel top coat actually ruined my manicure. So if you are wondering which between the two works better as a system and overall, I would recommend the Essie gel couture.
Now to discuss prices; I have seen the individual color coats and top coat retail for around $12-14 CDN. There is also a set which includes a top coat and a color coat for around $24-26 CDN. It is an investment to make but I do think you will be pleasantly surprised by the wear of this line. If you have tried out this line, leave me a comment about how you found it!
Tuesday, 8 November 2016
Pretty Woman Bamboo Cream nail treatment
Hello all,
I did receive the nailmedic treatment, bamboo cream from Pretty Woman quite a while ago and have been testing it out for you for a month! This bamboo cream is supposed to be a hydrating cuticle cream that can also help to strengthen your nails. Now the main claim behind this product is that it will hydrate your cuticles and improve the appearance of brittle and dehydrated nails. This product comes in a traditional nail polish bottle so you can brush it onto your cuticles and nails. Then you just need to massage the cream into your skin in circular motions.
The cream itself is not too thick and does not leave behind an oily residue. My favorite part about this cream is how quickly it sinks into my skin! I had just applied the product before taking this picture but it sunk in so quick. The cream always feels very cooling on my skin and smells very lovely and spa-like similar to their other products.
Most of the time, when I take the time to moisturize my cuticles, they get dry usually later that day because of how often I use and wash my hands. No big surprise there. But while using this cream, I noticed that the moisture lasted longer throughout the day.I really appreciated this because I felt like it really helped protect my cuticles from all the acetone remover I use. My favorite way to use this product was for my pedicure since they kept my cuticles hydrated for a longer amount of time.
As far as strengthening went, I felt like this product really helped my nails but did not make them too stiff. They were still flexible and hydrated, providing me with a nice way to maintain my nail health.
As always, Pretty Woman offers free shipping on their website for all orders so you can try out this product without worrying about shipping fees. It retails for $8 US and even after using it for a month, I have not made a large dent in the bottle so it will last you! If you do decide to try it out, I would love to know how it worked for you.
I did receive the nailmedic treatment, bamboo cream from Pretty Woman quite a while ago and have been testing it out for you for a month! This bamboo cream is supposed to be a hydrating cuticle cream that can also help to strengthen your nails. Now the main claim behind this product is that it will hydrate your cuticles and improve the appearance of brittle and dehydrated nails. This product comes in a traditional nail polish bottle so you can brush it onto your cuticles and nails. Then you just need to massage the cream into your skin in circular motions.
The cream itself is not too thick and does not leave behind an oily residue. My favorite part about this cream is how quickly it sinks into my skin! I had just applied the product before taking this picture but it sunk in so quick. The cream always feels very cooling on my skin and smells very lovely and spa-like similar to their other products.
Most of the time, when I take the time to moisturize my cuticles, they get dry usually later that day because of how often I use and wash my hands. No big surprise there. But while using this cream, I noticed that the moisture lasted longer throughout the day.I really appreciated this because I felt like it really helped protect my cuticles from all the acetone remover I use. My favorite way to use this product was for my pedicure since they kept my cuticles hydrated for a longer amount of time.
As far as strengthening went, I felt like this product really helped my nails but did not make them too stiff. They were still flexible and hydrated, providing me with a nice way to maintain my nail health.
As always, Pretty Woman offers free shipping on their website for all orders so you can try out this product without worrying about shipping fees. It retails for $8 US and even after using it for a month, I have not made a large dent in the bottle so it will last you! If you do decide to try it out, I would love to know how it worked for you.
Wednesday, 28 September 2016
Pretty Woman Foil Effects kit
Hello everyone,
Today I received a nail art kit from the brand Pretty woman which contains a black gelogic lacquer and four different pots of nail foils. The retail price for this kit is $7.99 USD which is the same price as buying an individual gelogic lacquer so the value is amazing.
The pots contain a silver, gold, copper, and multi-chrome foil and have 2 grams of foil each. In my opinion this is a great deal of foil to do your nail art with. The foil itself is very soft which I was not expecting. It does not break in your hands if you are trying to smooth it out and since it is soft, it molds very nicely to your nail. An added point of interest is that while handling the foil, my fingerprint was easily transferred to the foil creating a lovely effect. You can use scissors to cut the foil but I found using my fingers and nails did a well enough job. I did try to use a paper punch to see if I could cut the foil in the shape of a flower but the foil was too soft and it just ripped.
Now the instructions say to apply one coat of the gelogic color and let it dry then to work one finger at a time; applying a coat of gelogic and then adding the foil. This worked perfectly well as the shade in the kit, black, needed two coats to be opaque and the time to put the foil on the nail was very quick. I used a cuticle stick to transfer the foil onto the nail. Once the lacquer had dried, I attempted to push the foil flat but it was not perfect so I used two coats of top coat to keep it smooth. However, at one coat, it is still smooth enough that the foil is sealed and would not catch on anything so it is up to personal preference.
You can create really easy and amazing looks by mixing the foils, changing the color of your base and even how much foil you put on the nail. Removal can be tricky depending on how much foil you use. For the picture above, I found that the foil method was the best option to removing the foil without damaging my nail. I used my silicone nail clips with a cotton ball and nail polish remover and removed everything under five minutes. The leftover pieces removed easily enough with the cotton ball or even my cuticle pusher. If you applied less nail foil, then I found that the foil removed easily when I rubbed a cotton ball against the nail.
Overall, I really think the value in this kit is amazing since the price is the same as buying a gelogic lacquer or any other nail polish from Pretty Woman. You get a lot of foil, including a nice color variety, which is fairly easy to manipulate. Also this foil is something that works well with any kind of nail polish, you could even add it on top of a fresh clear coat to change up a manicure you were already wearing.
Today I received a nail art kit from the brand Pretty woman which contains a black gelogic lacquer and four different pots of nail foils. The retail price for this kit is $7.99 USD which is the same price as buying an individual gelogic lacquer so the value is amazing.
Now the instructions say to apply one coat of the gelogic color and let it dry then to work one finger at a time; applying a coat of gelogic and then adding the foil. This worked perfectly well as the shade in the kit, black, needed two coats to be opaque and the time to put the foil on the nail was very quick. I used a cuticle stick to transfer the foil onto the nail. Once the lacquer had dried, I attempted to push the foil flat but it was not perfect so I used two coats of top coat to keep it smooth. However, at one coat, it is still smooth enough that the foil is sealed and would not catch on anything so it is up to personal preference.
Two coats of black with the copper foil.
You can create really easy and amazing looks by mixing the foils, changing the color of your base and even how much foil you put on the nail. Removal can be tricky depending on how much foil you use. For the picture above, I found that the foil method was the best option to removing the foil without damaging my nail. I used my silicone nail clips with a cotton ball and nail polish remover and removed everything under five minutes. The leftover pieces removed easily enough with the cotton ball or even my cuticle pusher. If you applied less nail foil, then I found that the foil removed easily when I rubbed a cotton ball against the nail.
Overall, I really think the value in this kit is amazing since the price is the same as buying a gelogic lacquer or any other nail polish from Pretty Woman. You get a lot of foil, including a nice color variety, which is fairly easy to manipulate. Also this foil is something that works well with any kind of nail polish, you could even add it on top of a fresh clear coat to change up a manicure you were already wearing.
Saturday, 10 September 2016
Sally Hansen Miracle Gel
Hello, hello everyone,
I have a review for you today on the Sally Hansen miracle gel system which includes a wear test. Now I know that this system has lots of reviews, some sponsored and some very negative ones. As for myself, one of my very close friends uses the miracle gel polish and the Sally Hansen insta-dry top coat. She works as a lifeguard and regular nail polish does not last on her as long as the miracle gel does. So I thought it was high time for me to test it out. I picked up the shade Pretty Piggy and I got the regular miracle gel top coat, not the 2x volume top coat.
This set typically retails for $15 to $17 CDN in various stores. The main claims behind this system is that you can get 14 days of color and shine without a light to cure it. Also it is supposed to be more chip resistant that regular nail polish while being easy to remove. I have prepped my nails using Pretty Womans nail detox and will be testing two top coats as well as no top coat.
The application for this shade was really lovely, it has the same brush as their complete salon manicure line so it covers the nail very easily. This particular shade was really opaque on the first coat and fully opaque on the second. The polish itself dried very quickly and with ease. Now, because I wanted to give an in depth review, I put the miracle gel top coat on my thumb and middle finger. On my pointer and ring finger I have used seche vite. And lastly, on my pinky I have no top coat.
So starting with the pinky, you will notice a crack near the tip and that was due to user error and does not reflect on the polish itself. The shine was a very good amount, the same as the miracle gel top coat in my opinion. As for the pointer and ring finger, seche vite dried very quickly and has a high shine finish. The miracle gel top coat on the other hand, did not work out so well. In the bottle I had noticed it was very thin and heard that it can smudge your nail so I applied a thicker coat so as to avoid smudging. It did not work at all. No matter how dry my polish was underneath, the miracle gel top coat smudged it so badly that it created patches if you look up close. Also even though my base color was dry, my brush still got stained pink. Dry time was fairly long, when I had thought it was dry I could still leave fingerprint marks and then smooth them out. The shine was also fairly nice.
By day three my manicure was still looking very fresh with minimal tip wear on my right hand. On day four however, I did notice that the polish had started to crack on my left thumb and both of my middle fingers, which all had the miracle gel top coat. On day five, the cracking had also shown up on my right thumb and both my pinkies which had no top coat.
By day eight, I had noticeable tip wear on my right hand and minimal wear on my left. While my manicure looked nice because there was no chipping, the cracking was really noticeable and ruined the manicure for me. It looked worn out even though the shine was still prevalent. And it was on all my fingers except for my pointer and ring which were topped with seche vite.
I did not make it to day 14 because the chipping on my middle finger kept spreading and the cracking of the nail polish just looked horrible in person. Overall, even after ten days, I thought it had held up nicely especially when topped with seche vite. The color was still vibrant and there was still a good amount of shine on all of my fingers. It also did remove easily.
The miracle gel polish itself, is definitely something I would recommend. Looking at the polish itself, I did not have any issues with it until day five which is pretty amazing considering I had no base and top coat. The color popped and the shine was still there to make it look like a gel manicure. To extend the life of the manicure, I would recommend you use either seche vite as I did or try your own top coat. I think if I had used seche vite on all ten fingers, I would have made it through 14 days without my manicure looking horrible.
As for the miracle gel top coat, save your money and effort. The top coat smudged my nail color to the point where it reduced the opacity of the coat I already had on; so it would be horrible for nail art. It also took longer than the nail color to dry. The worst part is that on me, it caused my manicure to crack two whole days before my finger that had no top coat! So save your money on the top coat and just buy another color you like.
I will for sure buy more miracle gel colors because I was impressed with the formula and wear time. When I want my manicure to last I will reach for this and my own preferred top coat. If you've used the 2x volume top coat or have used this system, I'm curious to see how you found it so leave me a comment below!
I have a review for you today on the Sally Hansen miracle gel system which includes a wear test. Now I know that this system has lots of reviews, some sponsored and some very negative ones. As for myself, one of my very close friends uses the miracle gel polish and the Sally Hansen insta-dry top coat. She works as a lifeguard and regular nail polish does not last on her as long as the miracle gel does. So I thought it was high time for me to test it out. I picked up the shade Pretty Piggy and I got the regular miracle gel top coat, not the 2x volume top coat.
This set typically retails for $15 to $17 CDN in various stores. The main claims behind this system is that you can get 14 days of color and shine without a light to cure it. Also it is supposed to be more chip resistant that regular nail polish while being easy to remove. I have prepped my nails using Pretty Womans nail detox and will be testing two top coats as well as no top coat.
Two coats of Pretty Piggy
The application for this shade was really lovely, it has the same brush as their complete salon manicure line so it covers the nail very easily. This particular shade was really opaque on the first coat and fully opaque on the second. The polish itself dried very quickly and with ease. Now, because I wanted to give an in depth review, I put the miracle gel top coat on my thumb and middle finger. On my pointer and ring finger I have used seche vite. And lastly, on my pinky I have no top coat.
So starting with the pinky, you will notice a crack near the tip and that was due to user error and does not reflect on the polish itself. The shine was a very good amount, the same as the miracle gel top coat in my opinion. As for the pointer and ring finger, seche vite dried very quickly and has a high shine finish. The miracle gel top coat on the other hand, did not work out so well. In the bottle I had noticed it was very thin and heard that it can smudge your nail so I applied a thicker coat so as to avoid smudging. It did not work at all. No matter how dry my polish was underneath, the miracle gel top coat smudged it so badly that it created patches if you look up close. Also even though my base color was dry, my brush still got stained pink. Dry time was fairly long, when I had thought it was dry I could still leave fingerprint marks and then smooth them out. The shine was also fairly nice.
Day three, my right hand (my dominant hand).
Day three, my left hand.
Day eight, my right hand (my dominant hand).
Day eight, my left hand.
Day ten, my right hand (my dominant hand).
Day ten, my left hand.
I did not make it to day 14 because the chipping on my middle finger kept spreading and the cracking of the nail polish just looked horrible in person. Overall, even after ten days, I thought it had held up nicely especially when topped with seche vite. The color was still vibrant and there was still a good amount of shine on all of my fingers. It also did remove easily.
The miracle gel polish itself, is definitely something I would recommend. Looking at the polish itself, I did not have any issues with it until day five which is pretty amazing considering I had no base and top coat. The color popped and the shine was still there to make it look like a gel manicure. To extend the life of the manicure, I would recommend you use either seche vite as I did or try your own top coat. I think if I had used seche vite on all ten fingers, I would have made it through 14 days without my manicure looking horrible.
As for the miracle gel top coat, save your money and effort. The top coat smudged my nail color to the point where it reduced the opacity of the coat I already had on; so it would be horrible for nail art. It also took longer than the nail color to dry. The worst part is that on me, it caused my manicure to crack two whole days before my finger that had no top coat! So save your money on the top coat and just buy another color you like.
I will for sure buy more miracle gel colors because I was impressed with the formula and wear time. When I want my manicure to last I will reach for this and my own preferred top coat. If you've used the 2x volume top coat or have used this system, I'm curious to see how you found it so leave me a comment below!
Tuesday, 30 August 2016
Marc Jacobs Nail Lacquer
So for my birthday, one of my friends gifted me a Marc Jacobs nail polish is the shade Jezebel. I decided to do a wear test of this polish to see if the high price tag is mainly attributed to the brand name or if the quality can justify it. The main claims behind this polish is that it is supposed to have a "wet look" to it and that the brush is supposed to optimize nail polish application because it is meant to hug the curves of the nail.
The application was actually hard for me, the polish did not glide on easily and the brush was not curved at the end so I did not find that it hugged my nail at all. The color was opaque for me in two coats but in mainly yellow light, you could see the patches where it was uneven so you may want to do three coats if you are picky.
Two coats of Jezebel
Overall, I was really happy with the polish, it had a very nice amount of shine to it but it was not high shine. I prepped my nail with Pretty Woman nail detox to ensure that there was no oil on my nails. I used two coats for my test and did not add a top coat.
Day Six of wear
This polish lasted a very long time on my nails, I noticed tip wear around day three however I did not get any chips until day five. And the chip did not worsen the longer I wore the polish. I did get some dents and scratches in the nail polish but I find that happens to all nail polish the longer you wear it. The shine stayed pretty much consistent, it did not feel dull at all. One thing I did notice about the polish is that it was easily removed by rubbing alcohol which does happen to some of my other polishes. The main reason I ended this wear test on day six was because I wanted to change up my manicure.
In conclusion, I do think that $22 is fairly pricey for a nail polish however, this is a good quality formula and not just a branded item. Six days with just one chip and good shine is amazing considering that I did not use a base or top coat. Formula wise, this polish really stands out in my collection. If you have a nail polish lover in your life or are searching for high quality nail polish then this would be a lovely gift for you to splurge on.
Leave me a comment below letting me know what is the most expensive nail polish you've ever bought or received as a gift!
Wednesday, 3 August 2016
Top Seven China Glaze
Hello everyone, after taking requests it seems like you all wanted to see my top ten China Glaze next. Unfortunately, China Glaze is a fairly new brand to me that I have been using for only two years. I own around 40 of them and they are mainly from newer releases and some from the core collection. Also for some reason, my local Sallys Beauty store actually closed down so now I don't purchase any China Glaze since they are not as easy to find for a good price. So all in all, I only have my top seven China Glaze to share with you. I have taken a lot of time to go through my collection to bump up the number to ten but for one reason or another, they did not stand out enough for me. Also just like before, I do want to include two polishes that had disappointed me so you can better understand the brand.
Lets start with my first China Glaze, I saw this polish on a blog and I was under the impression it was a limited edition collection so when I found it in a random booth at the mall for $12 I bought it right away. Then I found out it was in their core collection and available at Sallys for around $6 I felt a little bad but the color is amazing. In my honest opinion, if you are someone who is just starting to experiment with neons, this is one of the first colors you should get. This is because for this shade to truly be neon, you will have to layer it over a white base to make the color pop. However if you wear it on it's own, you get a bright but wearable blue.
As I mentioned before, I am relatively new to the world of China Glaze so I have never seen the original version of this shade, but the current shade is definitely gorgeous. I think the best thing about this shade is that you do not need a white coat of polish to make the color pop. You can absolutely get the color in the bottle onto your nails. I will warn you though, the formula on this can be very tricky, it does dry matte so you get a quicker dry time. However, if you continue your coats too soon, the polish tends to drag itself off and create patches which will just need more coats to cover. So it is beautiful but just make sure you wait in between coats.
This shade has the same formula as Flip Flop Fantasy, I didn't wait long enough for the coats to dry so I had to do four coats instead of three. But I love this shade, it is a stunning bright light green and contrasts very nicely with my skin. The color is well worth the effort of properly applying this shade.
This is the last one that has a tricky formula, it needs the three coats and ample dry time in between. It is amazing! This color takes on another life when you get it on your nails instead of looking at it in the bottle. I love it for my toes in particular.
This is an unexpected favorite of mine. I actually bought this in a set of three thinking that this would be the shade I would end up giving away but it turned out to be the only shade I liked. I fell for this shade and it was the first time I thought that a cream/beige/nude color looked good on me. The formula for this is amazing, you might be able to get away with just one coat if you do it thicker.
This next one probably is not a surprise to you since it is one of China Glazes well known polishes. I adore red nail polish and the fine glitter in this one really works for me. This was one of their polishes that I thought was completely worth the hype. I have gotten friends to try this shade before and they ended up loving it.
My last favorite China Glaze I want to share with you is an amazing one coater. If you can still get your hands on this shade, I would say go for it. It applies so smoothly and dries very quickly. I can get a full manicure done with this shade in 5 minutes because it is so easy to work with. Also the shade is very beautiful and like nothing in my collection.
Now I have tried a good amount of China Glaze polish and while I was not able to pick ten of them for my favorites that does not mean I did not like a lot of them. I actually only have two disappointing shades and it was mainly due to the formula.
At Vase Value is a fairly frustrating polish; the color is absolutely amazing but the formula is really lack luster. Even if you wait for each of your coats to dry, this polish still pulls on itself leaving major patches. I have tried doing a thicker third coat but even then it does not the best and a fourth coat can just make the patching worse. So I do love the shade but the formula really puts me off.
Thistle do Nicely is an amazing neon but again fairly patchy where a fourth coat is not always helpful. However I find that if I use this on my toes, its easier for me to ignore the imperfections in the application. I do not reach for this for my fingernails though.
Overall, I think China Glaze is a great brand. I always try to buy them from Sallys when they are buy one get one free since I get to try more. I do have a lot of lemmings on my list from China Glaze and I hope to find more that I can leave. I would love it if you left me a comment telling me what your favorite China Glaze shade is or if you have any recommendations. Also, which brand would you like to see next?
Two coats of Too Yacht to Handle.
Lets start with my first China Glaze, I saw this polish on a blog and I was under the impression it was a limited edition collection so when I found it in a random booth at the mall for $12 I bought it right away. Then I found out it was in their core collection and available at Sallys for around $6 I felt a little bad but the color is amazing. In my honest opinion, if you are someone who is just starting to experiment with neons, this is one of the first colors you should get. This is because for this shade to truly be neon, you will have to layer it over a white base to make the color pop. However if you wear it on it's own, you get a bright but wearable blue.
Three coats of Flip Flop Fantasy
As I mentioned before, I am relatively new to the world of China Glaze so I have never seen the original version of this shade, but the current shade is definitely gorgeous. I think the best thing about this shade is that you do not need a white coat of polish to make the color pop. You can absolutely get the color in the bottle onto your nails. I will warn you though, the formula on this can be very tricky, it does dry matte so you get a quicker dry time. However, if you continue your coats too soon, the polish tends to drag itself off and create patches which will just need more coats to cover. So it is beautiful but just make sure you wait in between coats.
Four coats of Highlight of my Summer
This shade has the same formula as Flip Flop Fantasy, I didn't wait long enough for the coats to dry so I had to do four coats instead of three. But I love this shade, it is a stunning bright light green and contrasts very nicely with my skin. The color is well worth the effort of properly applying this shade.
Three coats of Frostbite
This is the last one that has a tricky formula, it needs the three coats and ample dry time in between. It is amazing! This color takes on another life when you get it on your nails instead of looking at it in the bottle. I love it for my toes in particular.
Two coats of What's She Dune?
This is an unexpected favorite of mine. I actually bought this in a set of three thinking that this would be the shade I would end up giving away but it turned out to be the only shade I liked. I fell for this shade and it was the first time I thought that a cream/beige/nude color looked good on me. The formula for this is amazing, you might be able to get away with just one coat if you do it thicker.
Two coats of Ruby Pumps
This next one probably is not a surprise to you since it is one of China Glazes well known polishes. I adore red nail polish and the fine glitter in this one really works for me. This was one of their polishes that I thought was completely worth the hype. I have gotten friends to try this shade before and they ended up loving it.
One coat of Wood you Wanna?
My last favorite China Glaze I want to share with you is an amazing one coater. If you can still get your hands on this shade, I would say go for it. It applies so smoothly and dries very quickly. I can get a full manicure done with this shade in 5 minutes because it is so easy to work with. Also the shade is very beautiful and like nothing in my collection.
Now I have tried a good amount of China Glaze polish and while I was not able to pick ten of them for my favorites that does not mean I did not like a lot of them. I actually only have two disappointing shades and it was mainly due to the formula.
At Vase Value is a fairly frustrating polish; the color is absolutely amazing but the formula is really lack luster. Even if you wait for each of your coats to dry, this polish still pulls on itself leaving major patches. I have tried doing a thicker third coat but even then it does not the best and a fourth coat can just make the patching worse. So I do love the shade but the formula really puts me off.
Thistle do Nicely is an amazing neon but again fairly patchy where a fourth coat is not always helpful. However I find that if I use this on my toes, its easier for me to ignore the imperfections in the application. I do not reach for this for my fingernails though.
Overall, I think China Glaze is a great brand. I always try to buy them from Sallys when they are buy one get one free since I get to try more. I do have a lot of lemmings on my list from China Glaze and I hope to find more that I can leave. I would love it if you left me a comment telling me what your favorite China Glaze shade is or if you have any recommendations. Also, which brand would you like to see next?
Monday, 27 June 2016
Pretty Woman NYC
Here are the last of the polishes I received from Pretty Woman NYC, I do want to take a moment to thank the brand for their generosity. I had tried their polish on my own and fallen in love with their product so I am very grateful to have this opportunity to share just how great this brand is.
I have five different polishes to share with you today and there were was one thing I wanted to bring to your attention. If you read my original post about Pretty Woman NYCs polish called "Pouty" you would know that one of the reasons I loved the polish was because of the brush, it was a medium sized brush but it was very dense and applied the polish quite easily. The story is not the same with these polishes unfortunately, I do not know if their standard brush is as dense as Poutys brush was or if they are all of regular density. If you own any polishes from Pretty Woman NYC, leave me a comment down below about their brush!
Three coats of Neverland Chrome
This polish if from their chrome collection and it is fully opaque at two coats, however the third coat does deepen the color a good amount. The formula on this was a little thicker than the usual consistency of polish but it was still easy to work with.
Three coats of Fairy Chrome
This stunning polish is also from the chrome collection and is absolutely beautiful. I really love green chrome and this one is no exception. Similar to the one above, this is opaque at two coats but the third coat deepens the color. It was fairly hard to photograph but the polish does have a pink, almost fuchsia shift to it.
Three coats of Pale Yellow Ceramic
Pale yellow ceramic has a "ceramic" or demi matte finish to it, so it is not a flat matte. Matte polishes are always fairly hard to work with since they dry so quickly that you don't have enough time to make your strokes even. I found that while two coats made the color fairly opaque, the third coat was really needed to make everything nice and smooth. I do want to make a disclaimer that the bristles on my brush were slightly bent which made it a little harder for me to get rid of the streaks. So you might be able to get away with just two coats. And this is from the ceramic collection.
Three coats of Relationship Goals
This bright bubblegum pink is from their valentines days collection and is stunning. It is very vibrant and I did not have to layer it over a white for it to be bright. This is a lovely color and I just love the way it contrasts with my skin tone.
Two coats of Cherry Bean
I like to save the best for last and this polish from the Nude collection really stuck out to me. First of all, I enjoy the concept of having a nude collection and while this is not the "proper" nude for my skin tone I find that it still flatters it very nicely. This is almost a smokey taupe, it has more grey than purple and some brown as well. This had a great formula and was really easy to apply.
Overall, even with the difference in brushes, I still enjoyed these polishes. I would have to say my top two colors have to be pouty and cherry bean they are fairly unique and have amazing formulas. If you have tried any Pretty Woman NYC polishes that you think I should try, leave me a comment down below.
Subscribe to:
Posts (Atom)